Category: Gadgets & Toys

Being Accessible

A friend of a friend has recently had what must be one of the most life-changing experiences anyone can go through. While in hospital for an operation, she had an apparently very rare but not unknown reaction to the anaesthetic, and found herself, suddenly and unexpectedly, completely blind.

She's a very smart and resourceful woman, though, and is making serious efforts to discover what technology can do to help in her situation. And it's an interesting challenge. I have some friends who have major visual impairments but can still use computers if, for example, the fonts are large and high-contrast, and they sit very close to the screen. And others have been blind from birth and have developed a whole range of skills to cope with it.

But for someone who has had to make the transition suddenly and unexpectedly in later life, and doesn't have, for example, the ability to read braille, what can we geeks do to help? Well, there are the obvious things like screen-reading and voice-dictation software, which are useful if the underlying operating system and apps make it easy to navigate the rest of the system. On the Mac, at least -- I can't speak for Windows -- there is quite pervasive VoiceOver integration at a fairly low level, so you can do most things, but learning it is tedious, and the challenge is then to navigate things efficiently using a wide range of key combinations on a keyboard which she's still getting used to not being able to see.

But one thing we should be able to do these days is take advantage of the power of mobile devices more. A surprise to me is that the iPhone, with its slab-like non-tactile surface, turns out to be remarkably good, mostly due, again, to Apple having thought about this stuff pretty early on. But I hope we'll start to see more apps that do, say, OCR-to-speech with minimal button presses, to allow people to read road signs and restaurant menus.

One of the best apps I've come across in my brief investigations is one that I think I'll also use myself. It's called Fleksy, and it's a soft keyboard that uses predictive text technology to allow you to type just the approximate shape of the word as it would appear on a QWERTY layout and then swipe to the right - it will guess the word for you, and speak it. This is vital for blind people, of course, but also makes it much harder for any of us to get those accidental word-substitutions that can cause so much misunderstanding. (A favourite was when an attractive female friend of mine, on a work trip and feeling in need of a drink, once texted her male colleague "Time for a quickie in the bar before we go?". Except that a small slip caused her to send "Time for a quickie in the car before we go?", which had a rather different interpretation...) Anyway, if Fleksy makes a mistake, you can just swipe up or down to pick another choice, or left to delete the whole word and do it again. I found I could type whole sentences immediately without looking at the keyboard. You can then send them to the clipboard, to email, etc.

This is not a new idea, of course - my friend Cliff developed the Swype system many years ago, for example - but I think it's a very nice implementation. I often wear a bluetooth headset when walking the dog, because I listen to so many podcasts and audiobooks. Now I can use it to help me send messages and respond to emails while tramping through the mud.

Just as the original T9 predictive text system (of which Cliff was also a co-creator) grew out of work done to help disabled people, so apps like Fleksy can also benefit the rest of us.

And in the meantime, any other recommendations for my recently-blind friend would be greatly appreciated!

New toy, happy bunny

Canon EOS 6DI got a new toy the other day. This is the Canon 6D, which is an interesting blend: it has a high-end full-frame sensor, but it also has a couple of features traditionally only found on less 'serious' cameras: wifi connectivity and GPS.

One of the first pictures I took with it was a self-portrait. I'm decadently reclining on the sofa with my laptop. What you can't tell is that the laptop and the camera are connected by wifi, and I'm tapping the space-bar to take this photo.

Quentin Stafford-Fraser

Looking forward to getting to know it properly... but I'm very pleased with it so far.

Who should really be suing Apple?

Dickon's comment on my last post reminded me of another post from four years ago.

Imitation is the sincerest form of flattery, they say, but it can also be the most expensive.

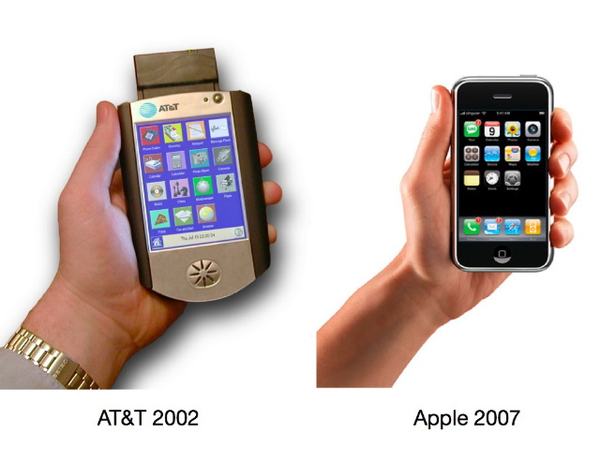
Dear Apple, a billion dollars would be nice, but I think the Broadband Phone team would probably settle for some nice new MacBook Pros...

:-)

Using Little Computers to control Big Computers

Here's my latest Raspberry Pi-based experiment: the CloudSwitch.

I don't discuss the software in the video, but the fun thing is that the Pi isn't dependent on some intermediate server - it's using the boto module for Python to manage the AWS resources directly.

I decided to build the app slightly differently from the way I would normally approach a little project like this. I knew that, even for this very simple system, I would have several inputs and outputs of various kinds, some of them with big delays, and I wanted to make sure that timing hiccups or race conditions didn't ever leave the lights displaying something that didn't represent reality.

So this is only a single python file, but it runs several threads - one that looks for button presses, one that monitors and controls the Amazon server, and one that handles the lights - including flashing them in various patterns. They interact with the main thread using ZeroMQ messages, which is a lovely way to do inter-thread communications without all that nasty messing about with semaphores and mutexes.

Update: Here's the very simple circuit diagram. The illuminated buttons I used have LEDs which take a little more power than the Raspberry Pi can really drive, so I put a couple of NPN transistors in there. It really doesn't matter too much what they are - I used the 2N3904.

For the Telemarq Pen, the writing's on the... screen?

Some of my readers will know about plans I started hatching about seven years ago, but worked on again more seriously last year, for a new device, which I called the Telemarq Pen.

The basic idea is that writing and drawing are incredibly important aspects of human communication - as demonstrated by the number of whiteboards we put in our offices - and yet something that is very poorly served by current technology. The nearest we get to a widely-deployed drawing device is the iPad, which isn't designed for it and reduces most artistic endeavours to the level of crude finger-painting.

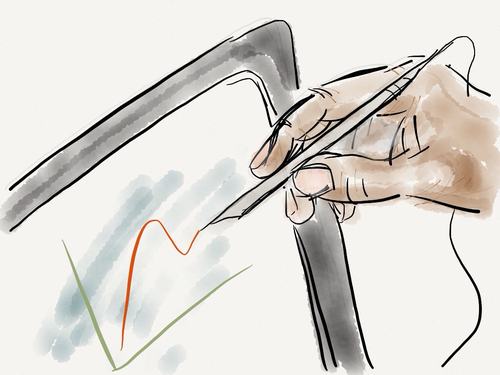
I had an idea for a low-cost stylus that could be used with any LCD display - a phone, tablet, laptop, even a TV - and yet would allow for exceedingly high-resolution drawing. The basic idea was to include a small camera - something that now costs very little - pointing at the screen, and use various cunning techniques to recognise the pixels at which it was pointing. I reckoned I could locate the pen on the screen at sub-pixel resolution, so it would be a very accurate drafting device, and yet could be made for a few dollars.

I did some experiments, wrote a draft patent, produced a nice slideshow, and was on the verge of going out and pitching it to investors. If you look carefully at the Telemarq logo you can see that pens were on my mind when I designed it! But at the start of this year, other things - mostly the need to earn some money again - put my plans on hold.

Which, it turns out, was just as well.

In May, an Apple patent was published showing that they had had very much the same ideas.

Today, there's a report of, guess what, Microsoft's prototype optical stylus.

So I think my plans are now definitely shelved! (Though if either of them would like to hire me, I have some fun ideas on how to optimise the location process!)

Now, I suppose I could be kicking myself that I didn't file some patents six or seven years ago, when I first started pointing cameras at screens - but I couldn't have afforded it at that point, and however good your patents, it's a brave man who takes on both Apple and Microsoft's lawyers! It would have been much more likely to result in ruin than riches. A clear illustration of the problems of the current patent system, perhaps?

So, in fact, I'm very grateful that the Fates conspired to make me abandon the project six months ago. But I can still go on at great length to anyone who'd like to buy me a beer about why such a device is vitally important and how it should be done!

I hope they pursue this seriously, beyond simply filing IP, because I, at least, would be an enthusiastic customer. So perhaps I'll get my pen in the end!

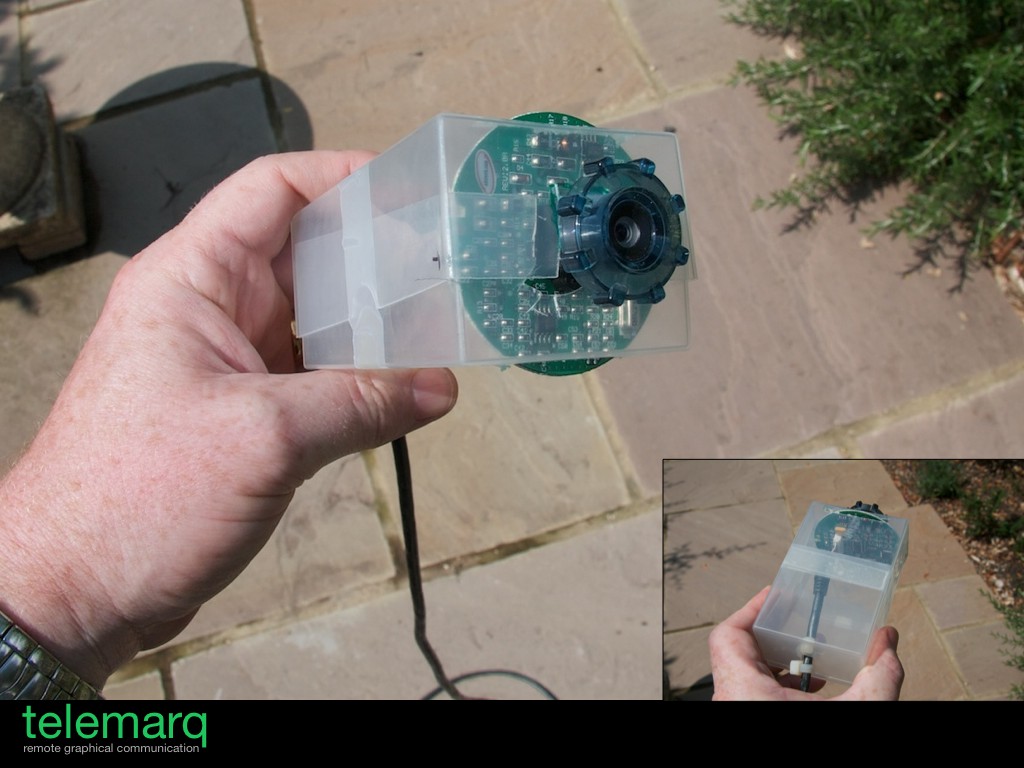
[caption id="attachment_4294" align="alignnone" width="600" caption="The first Telemarq pen prototype"][/caption]

Raspberry Pi Webcam Viewer

I finally got a chance to play with my RaspberryPi, so I threw together a quick experiment.


Update: A few people have asked me for a little more information. I'm happy to make the source code available, but it's not very tidy and a bit specific to my situation... however, to answer some of the questions:

The enclosure for the Raspberry Pi comes from SK Pang Electronics, and it's perfect for my needs. You can buy just the perspex cover, but they do a nice Starter Kit which includes the breadboard, some LEDs, resistors and the pushswitch. Definitely recommended.

For the graphics, I used the PyGame library, which has the advantage of being cross-platform: you can use it with a variety of different graphics systems on a variety of different devices. On most Linux boxes, you'd normally run it under X Windows, but I discovered that it has various drivers that can use the console framebuffer device directly. This makes for a quicker startup and lighter-weight system, though I imagine it probably has less access to hardware acceleration, so it's probably not the way to go if your graphics need high performance. You can read about how to get a PyGame display 'surface' (something you can draw on) from the framebuffer, in a handy post here.

To load an image from a file in PyGame is easy: you do something like this:

            im_surf = pygame.image.load(f, "cam.jpg")

where 'f' is an open file, and the 'cam.jpg' is just an invented filename to give the library a hint about the type of file it's loading.

Now, with a webcam, we need to get the image from a URL, not from a file. It's easy to read the contents of a URL in Python. You just need something like:

            import urllib
            img = urllib.urlopen(img_url).read()

but that will give you the bytes of the image as a string. If we want to convert it into a PyGame surface, we need to make it look more like a file. Fortunately, Python has a module called StringIO which does just that: allows you to treat strings as if they were files. So to load a JPEG from img_url and turn it into a PyGame surface which you can blit onto the screen, you can do something like:

          f = StringIO.StringIO(urllib.urlopen(img_url).read())
          im_surf = pygame.image.load(f, "cam.jpg")

I'll leave the remaining bits as an exercise for the reader!

If you like this, you might also like my CloudSwitch...

Remote keyboard and mouse for your RaspberryPi

Warning - technical post ahead...

My shiny new RaspberryPi came through the door this week, and the first thing I noticed was that it was the first computer I'd ever received where the postman didn't need to ring the bell to deliver it.

The next thing I discovered, because it came sooner than expected, was that I was missing some of the key bits needed to play with it. A power supply was no problem - I have a selection of those from old phones and things, and I found a USB-to-micro-USB cable. Nor was a network connection tricky - I have about as many ethernet switches as I have rooms in the house.

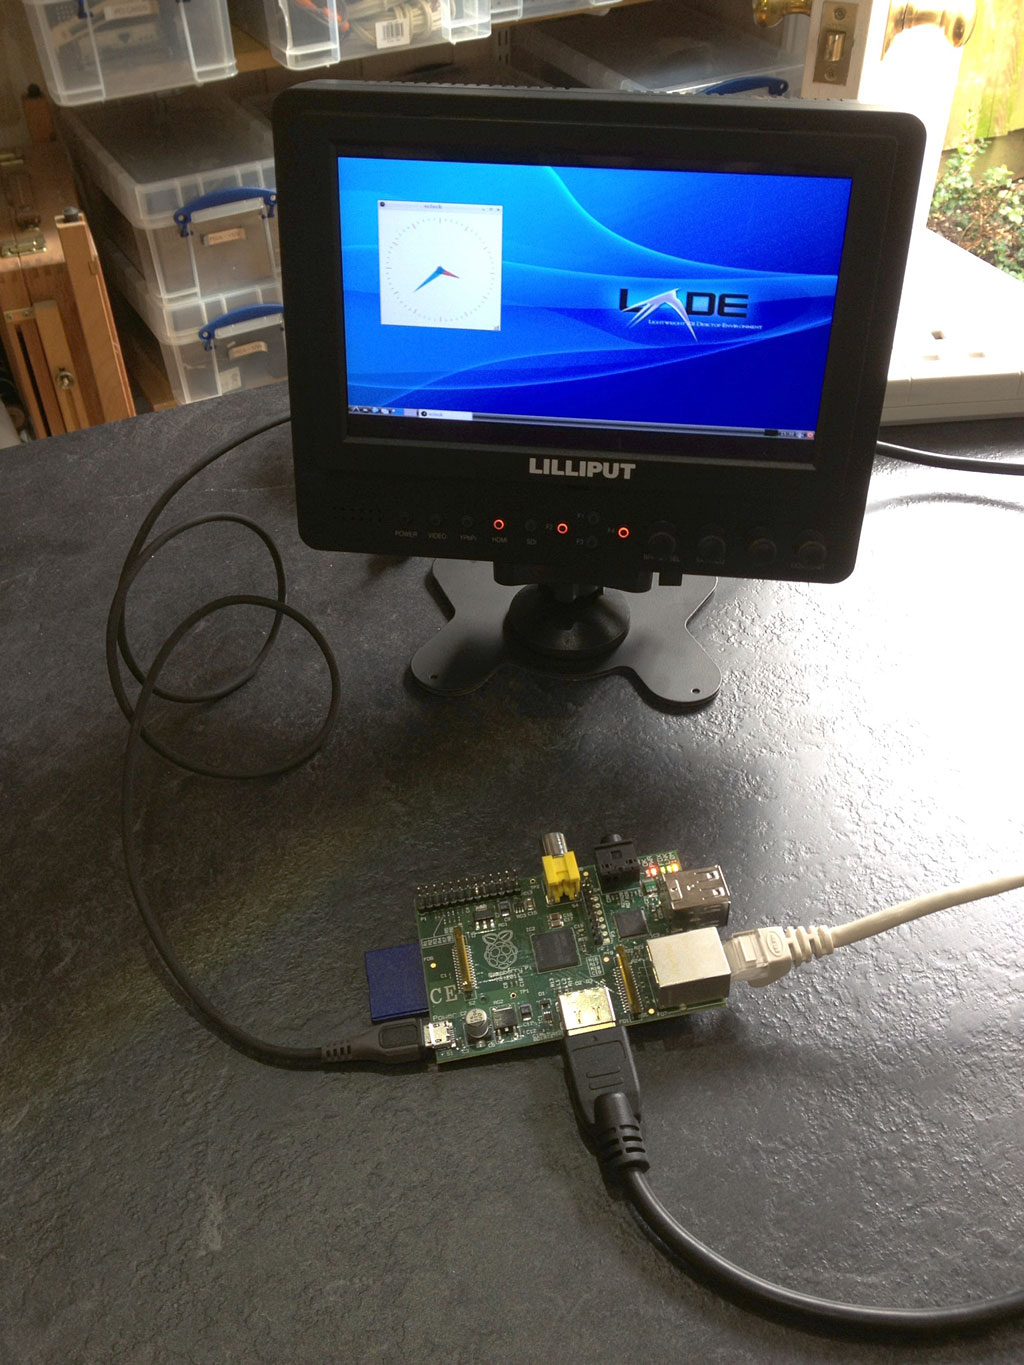
A monitor was a bit more challenging - I have lots of them about, but not with HDMI inputs, and I didn't have an HDMI-DVI adaptor. But then I remembered that I do have an HDMI monitor - a little 7" Lilliput - which has proved to be handy on all sorts of occasions.

The next hiccup was an SD card. You need a 2GB or larger one on which to load an image of the standard Debian operating system. I had one of those, or at least I thought I did. But it turned out that my no-name generic 2GB card was in fact something like 1.999GB, so the image didn't quite fit. And a truncated filesystem is not the best place to start. But once replaced with a Kingston one - thanks, Richard - all was well.

Now, what about a keyboard and mouse?

Well, a keyboard wasn't a problem, but it didn't seem to like my mouse. Actually, I think the combined power consumption probably just exceeded the capabilities of my old Blackberry power supply, which only delivers 0.5A.

If you're just doing text-console stuff, then this isn't an issue, because it's easy to log into it over the network from another machine. It prints its IP address just above the login prompt, so you can connect to it using SSH, if you're on a real computer, or using PuTTY if you're on Windows.

But suppose you'd like to play with the graphical interface, even though you don't have a spare keyboard and mouse handy?

Well, fortunately, the Pi uses X Windows, and one of the cunning things about X is that it's a networked display system, so you can run programs on one machine and display them on another. You can also send keyboard and mouse events from one machine to another, so you can get your desktop machine to send mouse movements and key presses from there. On another Linux box, you can run x2x. On a Mac, there's Digital Flapjack's osx2x (If that link is dead, see the note at the end of the post).

These both have the effect of allowing you to move your mouse pointer off the side of the screen and onto your RaspberryPi. If you have a Windows machine, I don't think there's a direct equivalent. (Anyone?) So you may need to set up something like Synergy, which should also work fine, but is a different procedure from that listed below. The following requires you to make some changes to the configurations on your RaspberryPi, but not to install any new software on it.

Now, obviously, allowing other machines to interfere with your display over the network is something you normally don't want to happen! So most machines running X have various permission controls in place, and the RaspberryPi is no exception. I'm assuming here that you're on a network behind a firewall/router and you can be a bit more relaxed about this for the purposes of experimentation, so we're going to turn most of them off.

Running startx

Firstly, when you log in to the Pi, you're normally at the command prompt, and you fire up the graphical environment by typing startx. Only a user logged in at the console is allowed to do that. If you'd like to be able to start it up when you're logged in through an ssh connection, you need to edit the file /etc/X11/Xwrapper.config, e.g. using:

sudo nano /etc/X11/Xwrapper.config

and change the line that says:

allowed_users=console

to say:

 allowed_users=anybody

Then you can type startx when you're logged in remotely. Or startx &, if you'd like it to run in the background and give you your console back.

Allowing network connections

Secondly, the Pi isn't normally listening for X events coming over the network, just from the local machine. You can fix that by editing /etc/X11/xinit/xserverrc and finding the line that says:

exec /usr/bin/X -nolisten tcp "$@"

Take out the '-nolisten tcp' bit, so it says

exec /usr/bin/X "$@" 

Now it's a networked display system.

Choosing who's allowed to connect

There are various complicated, sophisticated and secure ways of enabling only very specific users or machines to connect. If you want to use those, then you need to go away and read about xauth.

I'm going to assume that on your home network you're happy for anyone who can contact your Pi to send it stuff, so we'll use the simplest case where we allow everything. You need to run the 'xhost +' command, and you need to do it from within the X environment once it has started up.

The easiest way to do this is to create a script which is run as part of the X startup process: create a new file called, say:

/etc/X11/Xsession.d/80allow_all_connections

It only needs to contain one line:

/usr/bin/xhost +

Now, when the graphical environment starts up, it will allow X connections across the network from any machine behind your firewall. This lets other computers send keyboard and mouse events, but also do much more. The clock in the photo above, for example, is displayed on my Pi, but actually running on my Mac... however, that's a different story.

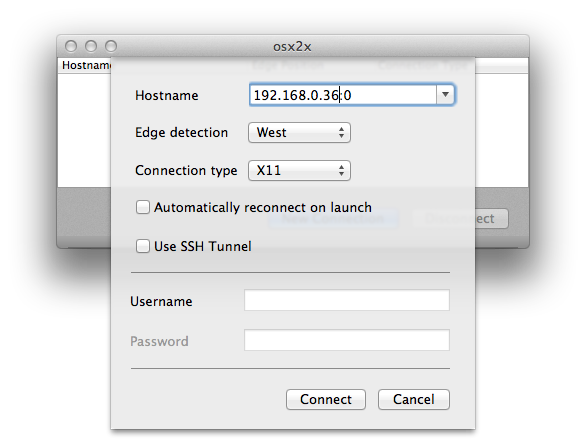
For now, you need to configure x2x, osx2x, or whatever is sending the events to send them to ip_address:0, where ip_address is the address of your Pi. I'm using osx2x, and so I create the connection using the following:

Once that's done, I can just move the mouse off the west (left-hand) side of my screen and it starts moving the pointer on the RaspberryPi. Keyboard events follow the pointer. (I had to click the mouse once initially to get the connection to wake up.)

Very handy, and it saves on desk space, too!

Update: Michael's no longer actively maintaining binaries for osx2x, and the older ones you find around may not work on recent versions of OS X. So I've compiled a binary for Lion(10.7) and later, which you can find in a ZIP file here. Michael's source code is on Github, and my fork, from which this is built, is here.

Small but powerful

My friend Aideen has been doing fun stuff with the TP-Link micro-routers.

These things are amazingly small - note the relative size of the USB socket - and very cheap.

She's written it up in a nice blog post here.