Old-school Data Archiving
Here's an unsolicited recommendation of a Mac utility... but first, a quick explanation of why I need it.
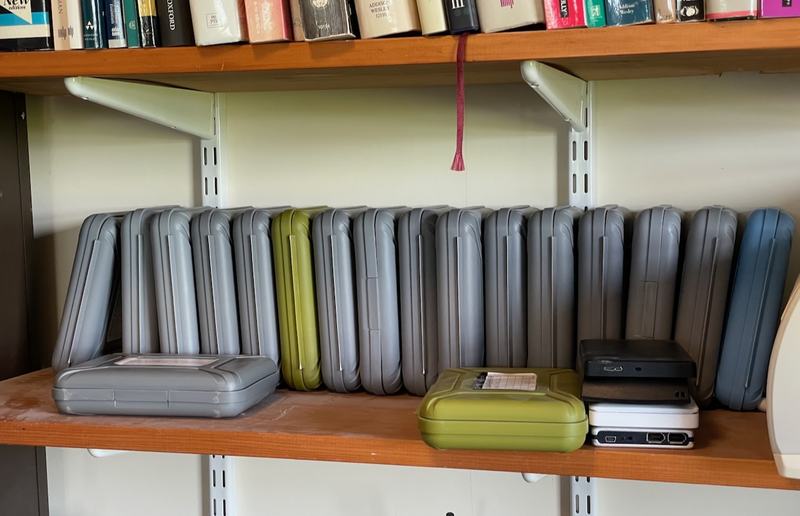
One of my bookshelves contains a large number of bare hard drives in protective cases. These store data that I am keen to keep, just in case I need it again, but which would consume too much space if stored on my normal machines or servers. Much of this comes from past video projects: the raw footage captured for a friend's wedding video, for example, or for one of my YouTube travel vlogs. Some of it is other data kept for a few years 'just in case': a clone of the hard disk of an old machine before it is wiped for sale on eBay, or an off-site backup of my mother's laptop.
In total, this adds up to several tens of terabytes. If it were more important, I would include it in my 'proper' data storage, most of which is on a Linux server using a ZFS filesystem (so it can be regularly and automatically checked for any errors) and snapshotted and backed up to another machine locally and at least one off-site location. But cloud storage starts to become really quite expensive once you're measuring it in reasonable numbers of terabytes, and this data isn't that important... it isn't even important enough that I want to keep all those disks spinning all the time and paying for the hardware and electricity to do so.
So a lot of it ends up on good old hard drives sitting on my shelf. Now, it's worth noting that these are actual hard disks, not SSDs. Much as I love solid-state drives for normal day-to-day use, one thing that's not emphasised often enough is that they are not good for data archiving, unless you power them up regularly and, ideally, run some scans on them. An SSD that's just sitting, unpowered, on a shelf will generally start to lose data much faster than an old-fashioned spinning-rust hard drive in the same state. And you should especially never rely on a cheap USB stick for archival storage.
However, hard drives do suffer from mechanical failure: they have moving parts, and if you power them up and those parts don't move as expected, you're stuck (though not quite as stuck as you would be with an SSD, because if the data were really important you could pay a lab a lot of money and probably get most of it back). But if the data were really important you wouldn't be storing it this way anyway.
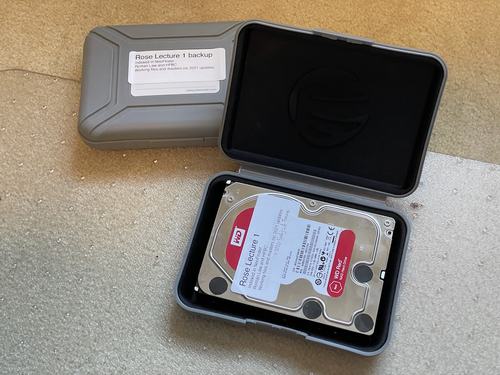
I mitigate the risk somewhat by keeping two clones of most things, using my old favourite utility SuperDuper. (Carbon-Copy Cloner is a popular alternative.) And the drives are stored in archiving boxes, which keep the dust and moisture out, and provide some shock-absorbing.
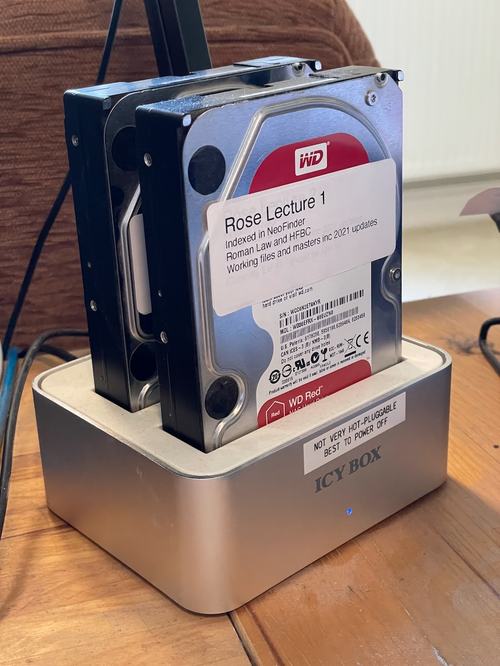
I also don't want to use off-the-shelf external drives which come in enclosures, because they're likely to have cheap power supplies which fail, or an interface which quickly goes out of date. So I use bare drives, and when I need them, I currently put them in a toaster-style dock with a USB3 interface. But I know I could connect them up to Thunderbolt or eSATA or whatever in the future, or slot them into some hot-swap enclosure.
However, the real challenge with having all this offline storage is how you find data on the occasions when you do need it. If my video editor tells me that it's missing a file called VO1257.wav which was used in this project, how on earth would I know if I had it on any of the disks on the shelf?
So this is why I've become a fan of a Mac utility called NeoFinder, which has had a dedicated following over the last 30 years, and you can get an idea of its vintage from the fact it used to be called CDFinder! You mount your external storage, ask NeoFinder to index it, and it keeps a catalog of all the files on your local disk, which you can still search when the external storage is back on your shelf (or in your remote server, or your fire safe, or wherever). So now you can about VO1257.wav and it will tell you which of your disks have a file of that name, how big the file is, when it was last updated, and so on.
In addition it understands a lot more about many types of file. If I search for 'Fleetwood', for example, it will tell me all the drives that have copies of Fleetwood Mac tracks on them, the recoding bitrate, duration, etc., and show me cover art for the album. If I search for 'sailing', it will show me my photos that are tagged with that keyword (along with a thumbnail and the metadata). It will also show me PDFs that contain that word. And it finds a track by Rod Stewart. You get the idea.
It's very handy, and I only use a fraction of its capabilities. Yes, it is, and it feels like, something you would use in the 90s... but that doesn't mean there aren't lots of valid use cases for it today.
However, to make it work properly, you need to be disciplined about two things.
Firstly, whenever you update the data on a drive, you need to tell NeoFinder to update its index for that drive before you unmount it and put it away. It does this easily and efficiently, and I just click that button before putting any drive back in its protective case. Or you can select several catalogs, tell it to update them, and it will prompt you to plug in the disks one at a time if they're not already mounted. And similarly, if you dispose of a disk, remember to delete it from NeoFinder too!
Secondly, you need to label your disks properly – not just with a handwritten PostIt note! – and use the same name in the catalog. I typically have a title like 'Video Projects Archive 2' stuck on the disk and on the case, and the label also says 'Indexed in NeoFinder'. (If like me, you used to try and write on the label what was stored on the disk, you'll know how much harder it is to keep that up to date!)
More than a decade ago I bought a Dymo Labelwriter USB printer, which seemed like a silly extravagance at the time, but turned out to be one of my most useful computer accessories and has been in regular use for all sorts of things ever since. You may or may not have a need for NeoFinder. But I bet you'd find you have a need for one of these!