Tag Archives: macos

Q Tips

Some simple tricks for Mac users.  Do you know all of these?


Direct link

Standalone installers for macOS

This is one of those posts intended to help people Googling for the subject, and to help refresh my memory when I next have to use it!  Non-techie, and especially non-Mac readers, may wish to skip this one!
Monterey installer

Most of us upgrade our Mac operating systems using the automatic software update process which replaces the existing version on our internal hard disk with the next version.

But suppose you don’t want to install it on the same hard disk?  This can be desirable for a variety of reasons: you may want to test a new version before committing to it; you may prefer to keep the existing disk intact; you may wish to boot your machine from one drive when the kids are using it and keep a completely different world when you are using it for work.  I remember, a long time ago, when my laptop’s screen died, I was able to borrow a friend’s spare one and run it for a week using a clone of my hard disk on an external drive before handing it back to him completely unchanged.  (Thanks, John!)

Anyway, I was helping a friend last night who boots her elderly iMac from an external USB drive, because the internal one is dead and she’s not currently in a position to replace it.  I wanted to give her a nice, clean installation on another external disk to use in future, and for that we needed to install Monterey somewhere other than the place where it was currently running.  To do this, you need a standalone installer program, which you can run from your Applications folder and direct as to the installation location.

It’s not always easy to find the right place to download these from Apple’s site.  So here’s a tip I came across which worked nicely.  You need to type a couple of commands into the Terminal, but they’re easy ones.

softwareupdate --list-full-installers

This will give you the list of available installers suitable for your machine.  On my new MacBook Pro it currently looks like this:

$ softwareupdate --list-full-installers

Finding available software
Software Update found the following full installers:
* Title: macOS Ventura, Version: 13.2, Size: 12261428KiB, Build: 22D49
* Title: macOS Ventura, Version: 13.1, Size: 11931164KiB, Build: 22C65
* Title: macOS Ventura, Version: 13.0.1, Size: 11866460KiB, Build: 22A400
* Title: macOS Ventura, Version: 13.0, Size: 11866804KiB, Build: 22A380
* Title: macOS Monterey, Version: 12.6.3, Size: 12115350KiB, Build: 21G419
* Title: macOS Monterey, Version: 12.6.2, Size: 12104568KiB, Build: 21G320
* Title: macOS Monterey, Version: 12.6.1, Size: 12108491KiB, Build: 21G217

Then, once you’ve chosen your version, you run:

softwareupdate --fetch-full-installer --full-installer-version 12.6.3

where ‘12.6.3’ is the version you want.  After quite a while, you’ll find an app named something like ‘Install macOS Monterey’ in your Applications folder.  When you run this, it will think for quite a long time, and then give you various options, including the preferred destination drive for your installation.  

In my case, I had downloaded the installer onto one external drive, and then was installing the OS onto another, and both of these could be done without actually requiring my friend’s machine for which the new disk was intended.

Now, some things to note: 

  • First, pay attention to the sizes listed in the output of the first command.  Most of the recent OSes have installers of around 12GB, which means you don’t want to be on a slow or expensive connection, or in a hurry, to do this.  You also need to have sufficient space free on whichever drive you put the installer.
  • Second, note that the list you get shows the appropriate installers for the machine on which you’re running the command.  If your eventual target for the disk is a different machine, if may not have the same options.  In particular, you can’t do this on an Apple Silicon Mac to get an installer for an Intel one, but even within the Intel world, you need a machine of similar vintage.
  • Finally, when you come to run the installer, it will only do so if the OS is a valid one for the machine on which you’re running it.  So if, like me, you’re doing it on another machine, make sure they’re reasonably similar.  In my case, I knew that Monterey would run happily on both machines. When the installer finishes, the machine will reboot from the disk it’s just created, but you can just shut it down and move the disk to its actual destination.

Finally, if you are using an external drive for your OS, you should probably go into System Preferences > Security & Privacy > FileVault and enable encryption for the disk.  If somebody decides to pinch it, or just unplug it and connect it to another machine, they wan’t be able to get in without your password.

For me, it all worked beautifully, and my friend can now boot into her old world or her new clean one simply by shutting the machine down and swapping disks.

Printing a booklet on a Mac

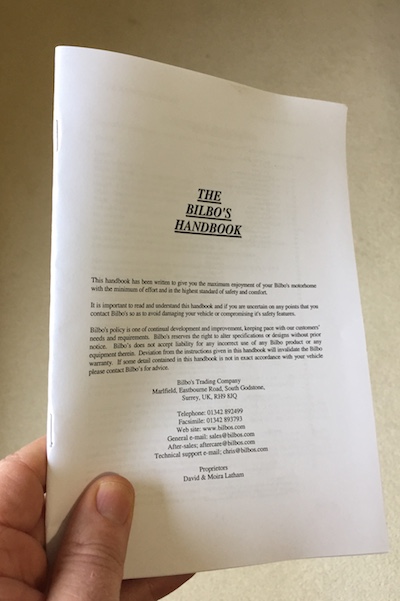
I had a 47-page PDF document that I wanted to turn into a compact A5 booklet – you know, one of those things where you get out the big stapler and make something like this:

Unfortunately, you need to print page 39 on the same page as page 10, and then pages 40 and 9 on the other side, etc, and when you get to anything more than about 4 pages it’s hard and tedious to do this by hand and get it right. My HP printer driver had a ‘booklet’ facility, and it worked OK for 8 pages, but let me down when given any more.

Now, there are utilities you can buy which can do exactly this, but why would I spend a tenner or two when I could instead use a few otherwise lucrative working hours and build one myself?

So here’s my solution, which could be a lot tidier, but does the only tricky bit of the job: getting the pages in the right order. It’s an Automator script which you can run as a service: once installed, you can right-click on a PDF and select Services, and you should find a ‘Make Booklet PDF’ option. It produces a new PDF on your Desktop with appropriately shuffled pages. You can then just print that using Preview as follows:

  • Go into the Layout section of the Print dialog.
  • Select Two-Sided Printing
  • Set Pages per Sheet to ‘2’
  • Set the ‘Two-Sided’ option to ‘Short-Edge Binding’

Now, please note: You should understand how this works before trying it! It’s not complex, and I could have made it much prettier and self-explanatory, but I was using Automator, which is so far from a real programming language as to be frustrating. It does, however, have a few useful ways of manipulating PDFs without having to install anything else, and my script will at least prompt you with some of the following information when you run it.

(Note too that if you’re reading this in 2022 or later, you definitely want to continue on to read the updates at the bottom of the post!)

OK,

  • First, the number of pages in your starting PDF must be a multiple of 4. Fortunately, you can easily append blank pages in Preview if needed. Select the last page and choose ‘Edit > Insert > Blank Page’ as often as needed and then save. The script will warn you if your page count isn’t right.

  • Then when you run the script, it will create a folder called ‘booklet-pages’ on your desktop. In here, it will create one PDF for each page of your document.

  • Finally, it will work out what order these pages should be in, and create a new ‘booklet.pdf’ on your desktop with the pages reassembled in that order.

  • You can then delete the ‘booklet-pages’ folder.

So, here’s a zip file containing the Automator script. You should be able to double-click it and open it in Automator if you want to see what’s inside, but I think if you put it into your ~/Library/Services folder within your home directory, it will probably just appear as a service if you right-click on a PDF file in the Finder.

Make Booklet PDF on desktop.zip (for pre-Monterey Macs)

Hope it’s useful to someone! Sorry I can’t provide any support if you try it, but recommendations and improvements are welcome from anybody with more Automator stamina than me! All I can say is that it works nicely on my Mac running High Sierra (10.13.6).

Some updates: please read these when you’ve read all of the above

Update:

If you’re doing this kind of thing, you may also like a video of MacOS PDF tips and tricks, which I made back in 2016 but which people still say they find useful.

Update April 2022:

MacOS version 12.3 and onwards doesn’t include Python 2, on which this script depended, and, while it does include Python 3, Apple haven’t updated Automator to make the switch quite as trivial as it should be! However, I’ve created an updated version which works on my Mac; I hope somebody can confirm that it works for them too! (See below.)

Update June 2022

The new version of the ZIP file below tries harder to find a copy of Python 3 on your computer.

For MacOS 12.3 and later:

  • Download this ZIP file: Make booklet PDF on desktop – 2022b.zip.
  • Your browser may uncompress this for you; if not, then double-click on the ZIP file to reveal the ‘Make booklet PDF on desktop’ workflow inside.
  • Double-click on this and you should be asked if you want to install it as a ‘Quick action’
  • This will then be copied into your ~/Library/Services folder as mentioned above, and you should find it in the ‘Quick actions’ submenu if you right-click on a PDF.

Update Sept 2023

Some people were seeing a final PDF that was blurry. I’ve changed the way the individual pages are combined back into a single PDF, which should fix this. It works on my Mac running Ventura 13.5.

For MacOS 13 and later:

© Copyright Quentin Stafford-Fraser