The standard Apple charger clips into this Spigen charging stand. Works nicely for me.
Category Archives: Gadgets & Toys
Is your technology getting underfoot?
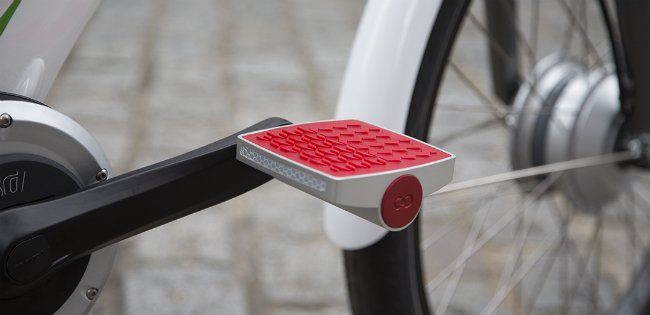
I think this is great. Not long ago we would have thought internet-connected cars somewhat futuristic. Internet-connected bicycles would surely be next. But how far can you push that idea? Well, how about instrumenting your cycling using a pedal which has its own 3G connection and is self-powered?
More information about Connected Cycle here and on their web site.
Wrist recursion
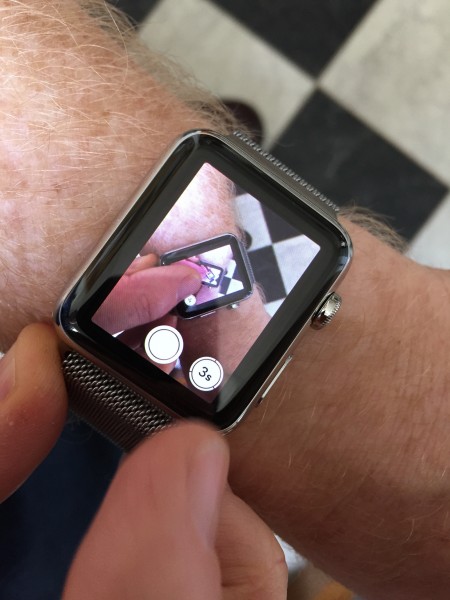
My new watch can be used as the viewfinder for my iPhone camera. So, of course, the first thing it wanted to do was take a selfie.
There’s a slight delay in the image, and in the shutter release, which means that the shot the camera actually took was after my finger had moved off the screen, but the image on the watch, from a second before, still shows it in place. If you click to see the full-size image, you can see a few levels of recursion (which says something about the resolution of this 1.5″ display!).
Titanium nostalgia
Just over 14 years ago, in one of my first blog posts on Status-Q, I referred to the amazing fact that Apple, with the impending launch of OS X, was about to become, overnight, the largest vendor of Unix operating systems.
Unix was, up to that point, beloved of those of us working in universities and other scientific institutions, but was notoriously unfriendly to anyone not familiar with its highly-abbreviated command language. It sold in small quantities on expensive workstations, and the idea that the creator of the cuddly Macintosh was about to start deploying it on ordinary desktops seemed astonishing. In a little over a decade it would have evolved to be not only at the core of their mobile phones, but even on their watches!
Today, I fired up the Titanium Powerbook G4, the machine I was just starting to use at about that time.
For nostalgia reasons, I was revisiting the classic Mac OS, but back then I had been playing with the developer preview of OS X for a while, and when it was officially released I switched to the Mac and never looked back. I didn’t realise that I had made quite such a transition at the time, but a few months later I wrote:
At CNET there’s a comparison of Windows 2000 vs Mac OS X which comes out in favour of OS X. I’m a bit dubious about the higher OS X score for hardware compatibility, but it’s pleasing none the less. I currently use 3 machines on a regular basis. One runs Win2K, one runs Linux, and one runs Mac OS X. They all have their pros and cons, but if I could keep just one, I think it would be the Mac. I find myself pining for it when I’m using the others and, for all its current limitations, the reverse is seldom true.
P.S. I noticed a couple of other things from those early posts. The first is that they are both called ‘[untitled]’, because the convention of putting a title on blog posts hadn’t been established back then. The second is that neither of the URLs I linked to still work now. Never assume the web is going to be a long-term reference archive unless you control the site yourself!
The new Duracell
I had the honour of meeting Elon Musk briefly some years ago. Back then, he was just doing space exploration. There aren’t very many people for whom you could write that sentence – even without the word ‘just’ – but for him, its inclusion is entirely appropriate.
Now, he seems to be doing… well… everything that’s cool. I have since admired his orbital exploits, ridden in his cars, and, of course, bought a significant proportion of my purchases using Paypal – which helps pay for all the rest.
The latest product is apparently to be batteries – here’s the new press announcement – but these are not your average AAs. They’re wall-mounting.
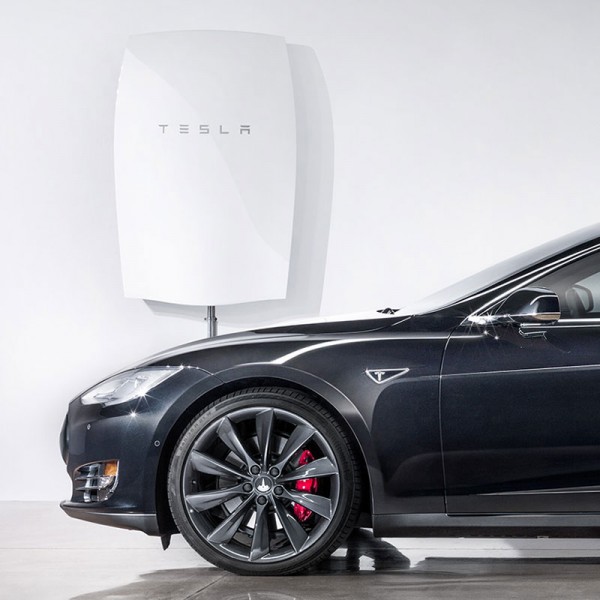
At 10kWh, these could run a lot of LED lightbulbs for a long time. Especially if you’re not also using them to recharge your model S.
They’re designed to make it easier for solar-equipped households to depend less on the grid, especially by time-shifting the peak sunshine energy at noon to the morning and evening, when there’s peak demand. That’s not simply about being green: just a few weeks ago, visiting friends were telling us about the ‘loadshedding‘ powercuts in Cape Town recently, where everybody got a scheduled two-hour outage each day to help cope with the insufficient power-generation capabilities in the country. This seems perfect for that, too.
Still, the next challenge Musk has to address is the really tricky one: the manufacture of solar panels which don’t ruin the appearance of the building to which they’re attached.
How to turn Apple Photos into a more powerful editor
Apple recently released OS X Yosemite 10.10.3, which includes their Photos app – the replacement for iPhoto.
This is unlikely ever to become my normal photo-management and editing tool, but it does have some nice features, and it has more editing controls than you might at first realise:
Also available on Vimeo.
The watchword
Like many other people, I’ve been eagerly awaiting the arrival of the Apple Watch. It hasn’t really arrived yet, you understand, but you can at least now see it, play with it, and plonk down large amounts of money for it, in anticipation of delivery in a month or two’s time. I spent quite a lot of time experimenting with it at the Apple store yesterday.
I must admit to being something of a watch techno-enthusiast. Back in about 1976, my brother and I were the first kids in my school to have a digital watch, and they, too, were made by a computer company, Commodore.
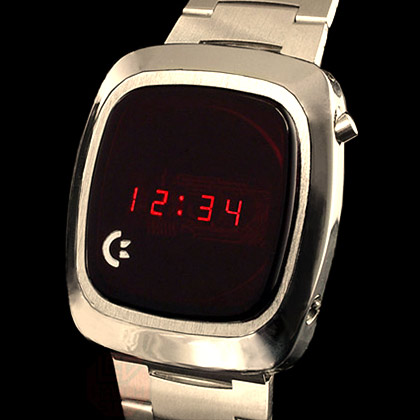
The company went on to create computers like the Commodore PET and the 64, but, unlike Apple, it made a watch before it did computers. Still, amusingly, it probably looked more like an Apple watch than any timepiece I’ve owned since, because the display used too much power to keep it constantly illuminated; the LEDs only lit up when you pressed the button. I still remember the excitement of staying awake outrageously beyond my bedtime, just so I could see the display change from 23:59 to 0:00. We bought our first digital watches on a discount offer. I think they were £13 each.
Roll forward about a third of a century, and I was an early backer of the Pebble project on Kickstarter.
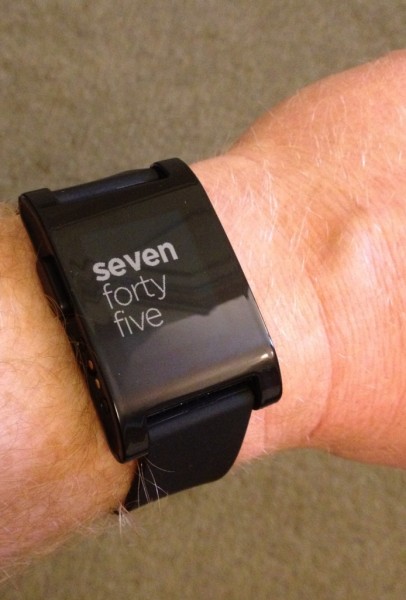
I’ve worn it every day since it arrived, and I even created my own watchface for it. It’s been fun, but it’s taken the developers a couple of years to get to the point where notifications are reasonably reliable and the API is easy to use. Many people who bought Pebbles sold them soon afterwards on eBay.
However, the team deserve a lot of credit, I think, for kickstarting (somewhat literally) the whole smartwatch revolution: few people thought watches were really in demand any more until they proved, rather dramatically, to the contrary, by being the biggest Kickstarter project ever. The upcoming Pebble Time looks nice, too, and it’s worth pointing out that you’ll be able to buy it for about the same price as some of the standard straps for the Apple watches. I think it could be a good option if you want to explore this whole smartwatch thing, especially if you don’t own a recent iPhone (on which the Apple Watch depends).
The Pebble, despite its quirks, has taught me some interesting things.
One is that the wrist is a very convenient place for a user interface. Avoiding the need to take my phone out of my pocket is a great benefit; I can dismiss incoming calls in a couple of seconds, for example, if they occur in the middle of a meeting – much less disruptive. About a year ago, I did it without thinking in the middle of giving a talk, and almost got a round of applause from the audience!
Another is that I use my Pebble many times a day, but very few of those are actually about telling the time. Watches were important for that purpose in the past, when you had to keep checking them to know whether you were getting close to your next appointment. But I’ve long since relied on my devices to notify me in advance of any upcoming events, and I spend much of my time sitting in front of a screen with a clock in the top right corner, or driving a car with a clock on the dashboard. Actually looking at a watch to discover the time is probably something I do about once every other day. So, yes, I’m about to buy my most expensive timepiece ever, when I’ve discovered that I don’t really need a watch for telling the time any more.
Actually, to my surprise, my number one use of the Pebble has been to stop and start audio. I’ve described in a previous post how I listen to large numbers of audiobooks and podcasts, and I seldom do this through headphones. Being able to pause a book from the other side of the kitchen just before I start the noisy coffee grinder is exceedingly handy. Being able to do so with a couple of button presses when I’m out walking the dog in mid-winter and wearing gloves is even more so. While driving, I’ll often stop and start music this way, because reaching my wrist is more convenient than reaching the controls on my dashboard, and so on. This bit of my Pebble’s operation has always been very reliable, perhaps because it’s operating simply as if it were the pause button on a traditional Bluetooth headset. As with every device, in my experience, it’s when you start doing complex Bluetooth LE stuff dependent on background apps that reliability becomes an issue.
Now, I don’t expect audio control to be quite so easy with the Apple Watch, since there is no single, eyes-free sequence of physical button presses that will do it. Using the screen won’t be so easy with gloves on, either. On the other hand, you can just lift up your watch and say ‘Hey, Siri – pause!’ But the key point is not that audio control is the reason to buy a smart watch – it’s that you won’t know what you’ll use it for until you get one. I know now that having controls and a screen on my wrist is a valuable thing, and that’s why I’m buying an Apple Watch, and would do so even if it didn’t offer telling the time as one of its functions!
So, yesterday morning, as soon as the pre-ordering opened, I went online and started planning my order. Delivery times were still quoted as the end of April. Then I paused, cancelled it, went upstairs to get my debit card, came back down and started again, by which time the first batch were sold out and delivery had slipped to May. Sigh. Ah, well, my birthday is in May. I ordered two different watches, actually, on the basis that, once I’d actually seen them in the store, I’d cancel the one I didn’t want. A couple of hours later, almost every model was listed as shipping in June, so I’ll still have some early-adopter street cred. (A friend suggested recently that ‘early adopter’ was something of a perjorative term now, and I should call myself a ‘trailblazer’ instead.)
I quickly jumped over to my local Apple Store’s site and booked a try-on appointment, then headed into town. There was actually much less chaos in the store then I’d expected, perhaps because it was a Friday morning and most of the honest hard-working people of Cambridge had real jobs to go to. So I got to spend nearly an hour trying on different straps and watches, and playing with the software.
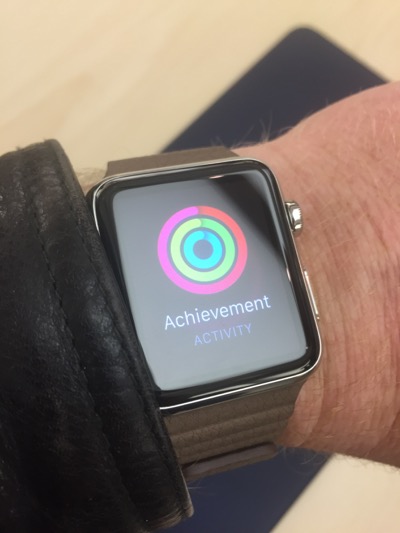
If you want general details, there are more reviews online than you could possibly read, but here are some of my early impressions:
-
First, the watch is beautifully made. This is no surprise from Apple, and you’d expect it for the price, but I was still struck by it. It feels slimmer on the wrist than the somewhat bulky impression given by the photos. The display is amazing – clear, high-contrast, easily readable: it makes the Pebble look very limited in that respect, though I haven’t tried it in bright sunlight. Reading even a normal text message on the old Pebble is a bit trying, but scrolling through longish emails on the Apple was just fine. And I’m now at the stage where I normally need to put on reading glasses for things at that kind of distance, so the fact I found it worked well without them even when displaying things like maps is a real testament to its clarity. And hey, displaying maps on your watch, with a little dot showing where you are! How James Bond is that?
-
The ‘digital crown’ works surprisingly well for scrolling. I was skeptical after seeing the videos, but it is very nice, at least for right-handers.
-
It really is difficult to decide which watch and strap combination you want simply by looking at pictures on line. Apple describe this as ‘our most personal device ever’, and that was reflected in the different selections being made by the cheery group of other enthusiasts who were gathered, like me, around the table. I was surprised to discover, for example, how much I liked the brown leather loop, which went well with my skin colour. (It was also interesting to see the majority of those other trailblazers, like me, removing a Pebble from their wrist before trying on the Apple.)

-
The straps are also works of art. Or, at least, works of exceedingly good design combined with excellent manufacture. Some of the prices are outrageous, though: take a look at the link bracelet above, for example. It looks a lot like the straps I’ve had on a couple of previous watches, and it costs £379. Yes, you read that correctly, and no, that doesn’t include the watch. I thought it was a typo when I first saw it on the Apple site. Only when you try it on, do you realise why that price is not quite as outrageous as it first appears. It’s unbelievably slim – much thinner than the photos suggest. The machining is superb. Each link in the bracelet has a clever little catch so you can remove or add them without the need for tools. And the clasp mechanism works beautifully. It apparently takes nine weeks to make. It’s still outrageous, though. I didn’t get one of those.
-
If I were starting now, I think I would buy the black aluminium ‘Sport’ one – it looks better than the silver equivalent, but only if you wear it with a black strap. This limits the options, but combining it with a black leather loop strap would be a fine combination. I didn’t go for that, in the end, because it wasn’t one of my early orders and if I switched I would have to wait another month, but for geeky guys who are less impatient than me, it might be a good choice. The silver aluminium, I thought, looked best with the blue leather loop. A third-party site, mixyourwatch.com, will let you explore the combinations to your heart’s content, and the Click project on Kickstarter should let you use more affordable, non-Apple straps.

-
The icons on the home screen are a bit tricky to hit unless you have more delicate fingers than mine. Not as bad as I was expecting, but I still don’t think it would work very well while I was cycling. You can zoom in using the crown, but I imagine most common apps will be accessed more through swipe-upward gestures than though this screen.
-
The user interface is not really intuitive, I found. But that’s not too surprising, because we’ve no experience of a device with so much functionality in such a small space and with so few physical controls. It’s hard to know where intuition would actually come from. The temptation is to think of it like an iPhone with a home button or a browser with a back button, and it’s not quite either of these. I think it needed a new model of interaction, though, and it will be easy to learn once you’ve played with it for a while.
-
A pleasant surprise, for me, was just how well Siri worked, using the watch as a microphone. This was in a busy and noisy Apple store, yet it was almost flawless. (Note, too, that I didn’t get the opportunity to pair the watch with my phone: the watch has wifi, and Siri is one of the features that works even without the phone being present.) I’m particularly keen on this because I’ve often wanted to use Siri while driving, yet it’s almost impossible through my car’s bluetooth kit. I’m hoping the watch will be a much better way to do this.
All in all, I came away very impressed, and pleased at having got my order in early. The price will be a real issue for many people, and even for enthusiasts like me who might be willing to spend more on a watch that will last for some time – my old Citizen served me very nicely for 13 years before I got the Pebble – this one comes with a big question mark over it: how long will it be before I want to upgrade it?
In the end, though, I paid the money, because I think this will probably last me longer than a phone, should have a good resale value if I want to sell it, and I’m hoping at least that things like straps will be interchangeable with future versions. (If comparing it with the cost of a phone, of course, you need to work out the true cost of the phone once all the months of contract are included, which typically adds a few hundred quid to the label price – there’s no such subsidy for a watch. And your phone doesn’t measure your heartbeat!) But mostly, I bought it because I’ve discovered how much I value having a user interface to my technology on my wrist, and this is, without a doubt, the best available.
If, however, you just want to tell the time, then I recommend Citizen…
Update: John Naughton pointed me at this splendid Alex cartoon.
Plus ça change…
In the old days, I had to wind my watch up each night, and every couple of months do a little fiddling to make sure the date indicator was current.
Today, I have to charge my watch up each night, and every couple of months do a little fiddling to make sure the firmware is current.
…plus c’est la même chose.
The Memory Desk?
I like this analogue solution for storing sketches and other notes, designed by Kirsten Camara… but I fear it might turn into more of an oubliette! The blueprints are available under a Creative Commons licence if you want to build one, though; more information at Colossal.
Connected keyrings and wireless wallets
A Telegraph piece by Rhodri Marsden about Bluetooth-enabled devices. Excerpt:
I don’t know if anyone else has noticed, but there seems to be a race to reinvent everyday objects, connect them to each other wirelessly, then make a promotional video with a ukulele, glockenspiel and handclap soundtrack. We then willingly hand over our money.
Nice. He goes on to discuss devices which talk to your phone, and alert you when you leave them behind.
I like this concept, but at present the likelihood that the phone app is still running on my phone, and that the Bluetooth connection hasn’t failed (due to whatever mysterious movement of the planets causes Bluetooth connections to fail), is exceedingly small, even when set against my notoriously unreliable memory.
No doubt this balance will shift, on both sides, as the years roll by…
One for each hand?
About two years ago, I pointed out that iPhones were being born faster than people.
Updated stats from the latest episode of MacBreak Weekly: new iPhones are now being sold at more than twice the global human birth rate.
They can’t keep this up indefinitely!
Good Vibrations
 As a student, I was a bit of an audiophile, at least in the sense of making regular visits to the best local hi-fi shop, passing a lot of time there, and spending rather more of my limited funds than I probably should have on speakers, amps and the like. In later years, I started to realise that much of the stuff I was reading in audio magazines was complete rubbish, or overt sponsorship, or — more typically — both, and my attention drifted to other things. But I’m still interested in proper scientific analysis of what sounds good.
John Gruber linked to this article by Dave Hamilton, which explains why we record things on CDs at 44.1kHz and 16 bits. Quick summary: you may think you can hear higher resolution than that, but you almost certainly can’t. As part of the discussion, he linked to this nicely-done blind test on an audiophile site, where people were invited to download high-quality recordings of different pieces of music, play them back on the best gear they owned, and say which they thought was the 16-bit and which the 24-bit recording. After gathering data for two months, he published the results. Summary: you can’t hear the difference, even if you’re a musician and have very expensive gear.
Now, as Hamilton points out, there are good reasons for recording in higher resolution, because you want as much information as you can have in the recording, mixing, processing stages before you produce the final mix, in the same way that you should take RAW photos rather than JPEGs so that you can do more with them before producing your final image.
But when you actually come to distribute your final output, it’s fine to ship high-quality JPEGs, and it’s also fine to ship CD-quality audio. If it’s well-produced, then any more is completely unnecessary, whatever the sales guys may say! Unless you’re Superman, of course, in which case, thanks for dealing with that Luthor guy and still finding time to read my blog.
© Copyright Quentin Stafford-Fraser


Recent Comments