Tag Archives: photography

Want to know how cameras and lenses work?

This is an amazing page by Bartosz Ciechanowski: a tutorial where you can drag things, rotate things and generally be interactive while learning how cameras work.

A great deal of labour must have gone into this, and it’s also a very impressive demo of what web browsers are capable of these days.

But if cameras aren’t your thing, don’t worry – Ciechanowski doesn’t stop there.

How about watches? Or internal combustion engines? Or…

Well, you get the idea! Pretty impressive stuff.

Thanks to Michael Dales for the initial link.

A well-rounded view

Over lunch yesterday, my friend Richard was expanding my limited knowledge of spherical cameras: cameras which can take an all-round image – or even video – of the world; an immersive view which you can then explore in a VR headset, or by holding up your phone and moving it around, or (suboptimally) in a regular browser window by dragging around with your mouse, StreetView-style.

Richard’s done a nice blog post about this, from which I’m shamelessly cribbing! Thanks, Richard!

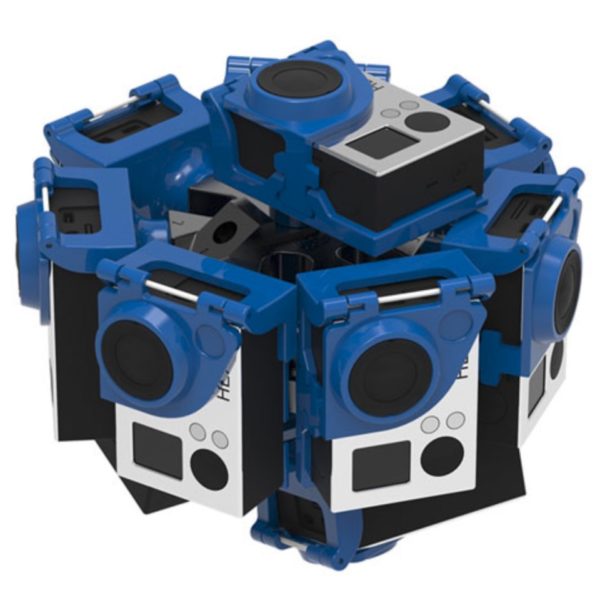
The normal way to get high-resolution all-round footage is to use a special rig like this one:

These are actually not that expensive… assuming that you already have ten GoPro cameras lying around ready to go in them. If not… it’s a different story.

But there are now more compact and affordable options if you don’t mind sacrificing some resolution – things like the Ricoh Theta V. For more information about how it works, Richard pointed me at this great video:

Now, we all know that you can get interesting feedback effects when, say, standing in a lift or changing room with mirrors on opposite walls, or by pointing live cameras at their own output.

What happens when you explore the same ideas in a spherical world? Cool things:

Oh, and if you’re like me, the next question is, “Can you do this kind of thing with live footage?” And the answer is yes. Here’s… ahem… a recording… to prove it…

A final thought.

In the old days, some comedy shows would emphasise that they were “recorded in front of a live audience”, so that you knew that the laugh track wasn’t canned. Soon, we’ll be able to recreate the effect of a live audience so realistically that it won’t be sufficient to persuade you that the recording was actually done in front of real people. Even if you have multiple spherical recordings.

So here’s a challenge to ponder over the weekend: How could you prove that a YouTube video of an event was originally a real event, shown to real people?

How to turn Apple Photos into a more powerful editor

Apple recently released OS X Yosemite 10.10.3, which includes their Photos app – the replacement for iPhoto.

This is unlikely ever to become my normal photo-management and editing tool, but it does have some nice features, and it has more editing controls than you might at first realise:

Also available on Vimeo.

A Lightroom and Capture One Workflow

Capture One is a program for capturing, processing and managing photos, and it’s used by many professional outfits, partly because it is good at the tethered shooting that often happens in a studio, partly because it’s made by Phase One (who also create some very nice and very expensive medium-format cameras), and partly because its underlying processing of RAW images is amongst the best available anywhere.

In other words, if you have a good camera, you can often make your photos look rather better with Capture One than with, say, Lightroom, Aperture, iPhoto or Adobe Camera Raw, though it will cost you around 200 quid for the privilege.

However, for the normal importing, managing and editing of large numbers of images, I find Lightroom to be much faster, more capable and more reliable.

So here’s a little tutorial about how I set both apps up to allow images to be moved easily between them, so I can take advantage of the best bits of both.

Video also available on YouTube here.

Post-processing RAW for Fujifilm cameras

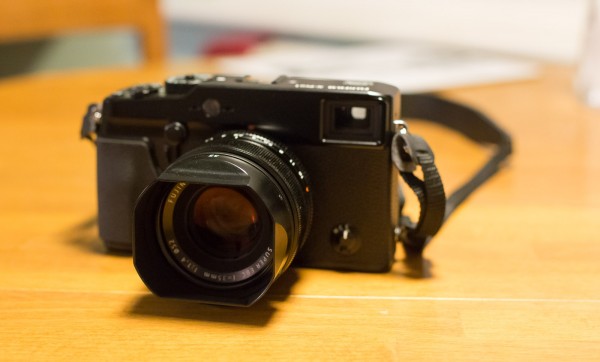
One thing for which the Fujifilm cameras (such as my beloved X-Pro1) are known is their impressive on-board JPEG converter, which can produce sufficiently yummy images that many people who would otherwise shoot RAW just stick to JPEG with these devices.

I, however, want to stick with RAW, and I found that getting the best out of it takes rather more initial tweaking with the Fuji cameras than it did, say, with my Canon. I eventually settled on a small boost to the saturation (+13), and quite a large amount of sharpening (+60), and saved that as a Lightroom preset which I now apply as I import any images coming from the X-Pro1.

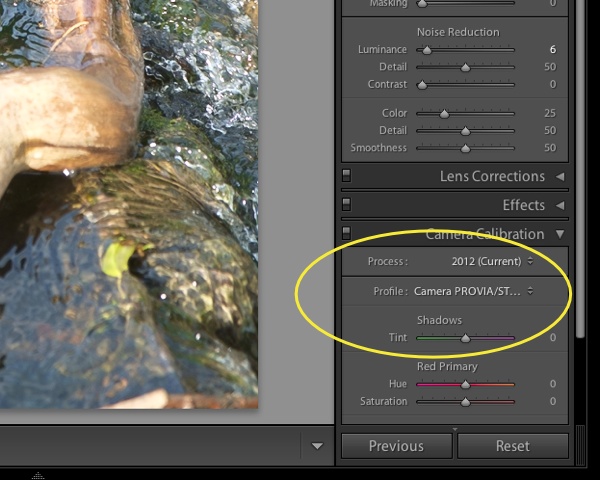
However, the biggest improvement came, I think, when Adobe Camera Raw (the engine behind Lightroom & Photoshop imports) was upgraded a couple of months ago. One of the easy-to-miss features was the inclusion of Fujifilm camera profiles which mimic the film emulation modes found in the camera. Even when I had upgraded and knew it was there, it was still a little tricky to find, but it’s under the Camera Calibration section of the Develop module:

Lightroom-provia-600

(click for full size)

I’ve found that experimenting with these profiles, and particularly using the VELVIA emulation while reducing my previous saturation setting a little, can bring much more richness to the colours.

Sarah & Hubertus

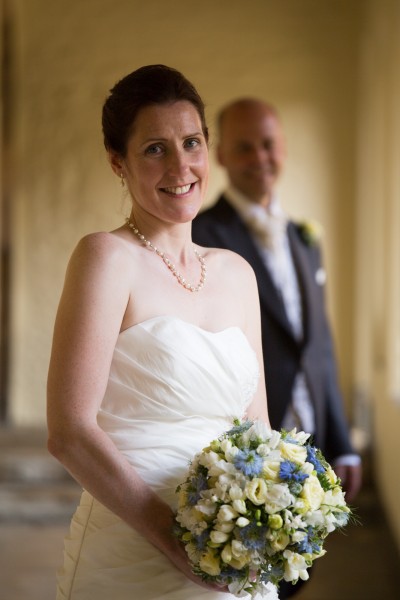
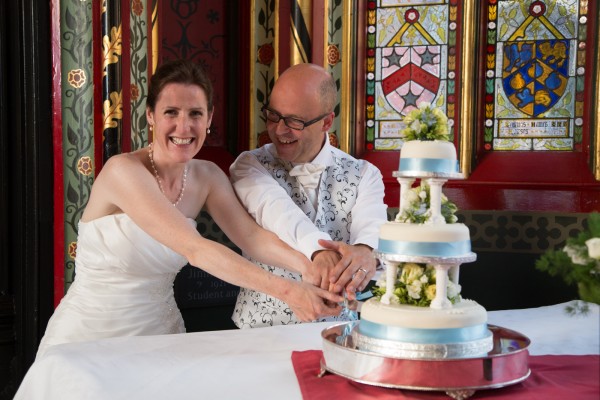
About three weeks ago, my very good friends Sarah and Hubertus got married in Queens’ College here in Cambridge. They were good enough, and foolhardy enough, to ask me to take the photos.

2013_07_21-14_46_36

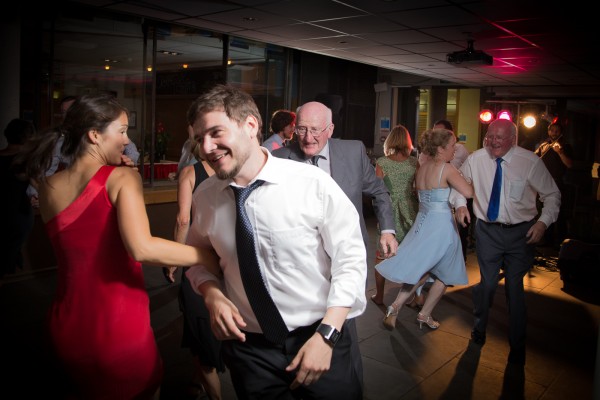
It was a wonderful occasion – great people, lovely weather, delicious food, and a really excellent ceilidh band in the evening.

2013_07_21-16_44_39-Edit

Being ‘the photographer’ was a great learning experience for me, and gave me a huge respect for the professionals who do this on a regular basis.

In particular, at this (otherwise wonderful) venue, every single room had challenges from a lighting point of view. One was very dark, one had a low white ceiling, and one was lined with glass-fronted bookcases, which made it a real challenge to position the flashguns! But things mostly worked out in the end.

2013_07_21-16_08_24

Even the outdoor shots had to be carefully managed so people weren’t squinting into the bright sunshine, and despite visiting beforehand and working out where the sun would be at about the time the ceremony was finished, I didn’t quite get it right. The bride and groom may hope for glorious sunshine on their wedding day, but, trust me, the photographer doesn’t!

Still, everyone was very tolerant of the inexpert photographer, and, above all, we all came away with happy memories of a very cheery occasion.

2013_07_21-20_53_53

More photos from the wedding can be found here.

Understanding your DSLR

I always enjoy Jeff Cable’s photography tutorials. Here’s a good talk to recommend if you know somebody who has just got a DSLR, or is wondering about getting one. What kind of things can you do with it, and what do you need to know about it, if you’re used to a fully-automatic point-and-shoot?

Remember that these days you may need to click the ‘YouTube’ logo and watch it there if you want to do so in full-screen mode.

Short, sharp and to the point

Beginners in photography can (understandably) get confused by the fact that big numbers mean small apertures, or that shooting 'wide open' implies a small depth-of-focus. I liked this mnemonic from Chris Orwig on a recent This Week in Photo podcast:

Imagine you're shooting a line of people. If you want one person in focus, use f/1. If you want all 16 in focus, use f/16.

Nice and simple.


DNG (Does Not Go)

I shoot almost all my photos in RAW format, which means that my important originals are in a variety of different formats: some Nikon, some Canon, some Panasonic. All of these are proprietary formats (though they’ve generally been reverse-engineered), and so not really ideal for long-term archiving.

It was for this reason that Adobe, some time ago, came up with the DNG — Digital Negative — format: an open standard intended for things like archiving. There are tools for converting most things into DNG, and the idea is that you’ll always be able to get your images out. Some cameras even save DNG as their native format. It’s a very good idea.

In theory.

The problem is that almost none of the tools I use support it. Adobe Lightroom does, of course, and makes it nice and easy to convert images automatically as you import them from your camera. But, once I have my image as a DNG, I find I can’t open it in Aperture, Preview, Acorn or even Photoshop CS3. I don’t get thumbnails in the Finder. I tried reverting to earlier, less efficient versions of the DNG format with fewer fancy options but it still didn’t help, unless you go back to really early variants, which can multiply the file size by three.

I could, of course, view my DNG files in Photoshop if I adopted the standard Adobe solution: pay hundreds of pounds to upgrade a product I paid hundreds of pounds for a little while ago. But I have the latest versions of other software products and none of them can open recent DNGs. Some of it may boil down to insufficient support in Apple’s underlying libraries. Whatever the reason, everything can open the closed, proprietary formats, whereas even Adobe’s DNG Converter can only convert to other forms of DNG. A few special tools like RPP can convert them to TIFFs, as long as you’re not using the latest DNG variants.

I’ve written about this before, but I repeat the experiment periodically to see if things have improved, because I really like the idea of storing things in an open raw format. But, sadly, at present, putting your files into DNG seems to imply locking yourself into expensive Adobe upgrades.

Let there be Lightroom

In the photography world, there are two big contenders for organising your digital photos – Apple’s Aperture, and Adobe’s Lightroom. There are also apps like iPhoto and Picasa which tend to appeal more to the mass market, not least on the basis of price, and there are some with niche followings – Bibble Pro, for example, now owned by Corel – but in general the majority of professionals or keen amateurs tend to opt either for Aperture or Lightroom. They’ve been made more accessible recently by a bit of a price war: when I purchased Aperture it was over 150 quid, but can now be had on the Mac app store for £54.99. Lightroom 3 is rather more pricey in general, but is available at around £100 for the next couple of weeks, no doubt because version 4 is about to be released.

I’ve been an Aperture user almost since it first came out – it’s a lovely program, and has always done what I needed it to. There are some areas where I think it definitely beats Lightroom – general ease of use, book and calendar printing, geotagging, syncing with iDevices etc – and does so for half the price. I have found very little in Lightroom that Aperture can’t do equally well.

But it does have a couple of limitations. The first is that it’s Mac-only, so if I ever had to move to Windows, I would need to migrate. And the second is that Aperture can, on occasion, be decidedly slow. It keeps improving, and with a bit of careful tweaking (like turning off the Face Recognition functions), can be made run at an acceptable speed on my machines, but it’s worth pointing out that my current Macs are pretty fast ones, and those with more elderly hardware might well find it a trial.

So I’ve been experimenting with Lightroom for a couple of days, and have decided to try switching to it, even though I know that adopting any Adobe product is likely to prove expensive in the long run!

If you search the web, you can find various bits of advice on how to do a migration – there are various people who have gone in either direction and documented the process. You can’t take everything with you. Each app has its own set of effects, filters, and adjustments, and they work not by changing the original files, but by storing in a database the tweaks that you apply and displaying those. Most of the crops, colour balancing, vignettes and exposure changes cannot, therefore, be moved from one to the other, unless you export the tweaked versions as separate files alongside the originals. (One way to do this is to create a Smart Album using the ‘Adjustments: are applied’ filter, and then export TIFFs or JPEGs of anything it contains.)

Any organisational arrangements – folders, books, albums, or smart folders – except those represented directly by filesystem folders, will also not be transferred. But some things can be ported across: metadata such as keywords, copyright information, and geotagging (location information), because there are standard ways of storing such things that both programs respect. It’s quite possible, in fact, to have your master files in one place on the hard disk and open them in either Aperture or Lightroom as the mood takes you, depending on which facilities you need. That way, I think, madness probably lies, unless you’re very careful.

There’s also a slight complication in that geotagging has been very important for me in recent years. Nearly 8000 of my images have accurate latitude and longitude attached, and I don’t want to lose that. But I have Canon RAW files, Panasonic Lumix raw files, and a variety of JPEG vintages, and the EXIF extensions which support GPS information have not historically been equally well supported by all of these, or by the software which interprets them. Sometimes a JPEG can store it, sometimes it can’t.

So, in case anyone else is considering a similar move, this is my plan for the migration.

  1. In Aperture, use keyword tags to mark organisational features that you want to be preserved. Remember, an album called “Bob’s Wedding” won’t come across, but tags will. So go to each album, select all the photos, and tag them. You can then always recreate the organisational structure in LR if wanted, or just search using tags.
  2. Use Aperture’s File > Export > Master… command to copy the original images to a new location. For the metadata option, choose the ‘Create IPTC4XMP Sidecar File’ option. This will create, alongside each image, an XML file with the same name but a .XMP extension, which contains your metadata, including your ratings, keywords, and location info. It largely gets around the fact that different image formats can store different amounts of metadata, so hopefully the important stuff should be preserved. The process can take some time: from some sample experiments, my 22,000 images will take about 11 hours to export. Then, when you import each photo into Lightroom, the sidecar file will automatically be read and associated with the image. Some people, in fact, prefer to keep sidecar files with every image, so that the original file is never touched and the metadata is in an open, human-readable format which can easily be moved around. Lightroom can be told to keep the sidecar file up to date as you make changes, but you do run the risk then of having metadata in the image file, or in the app’s database, or in the sidecar file getting out of sync, and sidecar files are only maintained by Lightroom for RAW formats, not for JPEGs, TIFFS, PSDs or DNGs.
  3. Import the images into Lightroom as DNGs. I chose to convert to the open DNG (Digital Negative) format rather than keep the individual camera-manufacturer’s RAW files. No information is, in theory, lost by this process, and it seems to me more likely that, many years from now, software will be able to read it. In addition, it is good at storing metadata, so should reduce the issue of having multiple copies of that stuff around. It does, however, involve another copy, and a conversion, of the big image files. I imagine this may take really quite a long time! And remember, you will now be creating your third copy of the originals, so make sure you have plenty of disk space. But it can be useful to do it in stages, anyway, because you may want to build up a keyword hierarchy in Lightroom. For example, some of my first photos were tagged with ‘Sydney’. I created a keyword hierarchy which put this under ‘Places > Australia’, and future imports then use that. You can always move things around later, but it may be easiest to do so before the list gets too big.
  4. Delete whichever of the earlier copies of the images you no longer need. (Having made sure you have a good backup, of course.)

Well, that’s the plan, based on lots of experimentation and on recommendations from other sites. Hope it’s useful to someone: I’ll let you know how it goes in due course!
© Copyright Quentin Stafford-Fraser