Tag Archives: iphone

Location, location, revisited

Previously on Status-Q…

Regular readers may remember that a couple of months ago, I lost my glasses and found them again. If you missed that particularly gripping episode, turn back to Location, location, location (or, ‘How technology saved me a few hundred quid yesterday’) and then you’ll understand the background here.

After posting it, my friend Phil Endecott got in touch with me. “Am I to understand”, he said, “that you would find it useful if you had a map app that could show both the locations of your photos and your current location at the same time? If so, I may have just what you need….”

And he did indeed. Phil, you see, is the author of UK Map, an iOS app that I’ve had for as long as I can remember, and one I should talk about more, because I use it all the time, especially when looking for new dog-walking routes. Yes, I may use Google Maps to find out how long it’ll take me to drive there, and Streetview to check that there’s likely to be a parking spot when I get there, but once I’ve laced up my walking boots, then I generally switch to UK Map. It combines free or paid-for Ordnance Survey maps with footpaths from Open Street Map, and, certainly round here, it’s a much better guide than almost anything else as to where you can actually go for a walk.

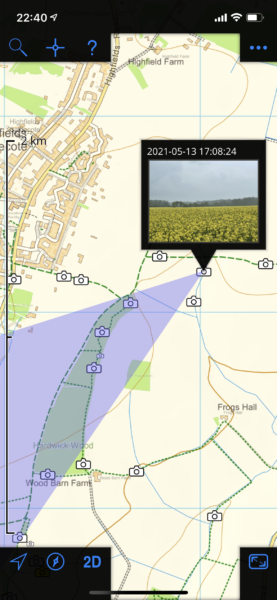
New features get added periodically and, like much of the cool stuff, are often buried deep in some menu below some unassuming icon in the corner, making them very easy to miss, so you really do want to go to the home page and read it carefully to see what the app can do, and then to the help button in the app to see how to do it. I don’t check these often enough, but when Phil’s message prompted me, I had another explore and found that, yes, it can show your photos on your maps. This is the site of my aforementioned adventure:

and if I had been there at the time of writing this, the little blue dot would indeed have shown me exactly what I needed to know. (The violet-coloured triangle there, by the way, is showing the rough direction in which the phone was pointing when it took the picture, and therefore shows what you may be able to see in it. Neat, eh?)

Anyway, I’ve mentioned UK Map before, but I’ve used it for so many years that I take it for granted. I do think that if you put in a little time learning what it can do, you’ll find it repays its very modest purchase price. Actually, it’ll repay that even if, like me, you really only scratch the surface.

P.S. If you happen to be anywhere other than the UK, this will be of limited use, but if you’re in North America, Phil is also the author of the highly-rated Topo Maps

Activating Home Automations using NFC tags on iOS

Now that I have a shiny new iPhone, I’ve realised that I can finally start playing with NFC tags, and, in particular, they can do interesting things around the house by making them trigger actions in my Home Assistant system.

I do alread have various Zigbee buttons around the house, and in general these are more convenient, since you can just press them without needing a phone in your hand! There are a couple in the sitting room, for example, which toggle our ‘movie mode’. When movie mode is switched on, the lights in the hall, kitchen and sitting room dim to a low warm glow, any lights that reflect in the TV screen turn off completely, the temperature in the room is raised by a degree or two, and the TV & DVD player switch on. When movie mode is switched off, everything reverts to its previous state. I don’t want to have to pull out a phone to do this; it’s much easier to turn it on and off with a button, or to use voice. “Alexa, it’s movie time!”
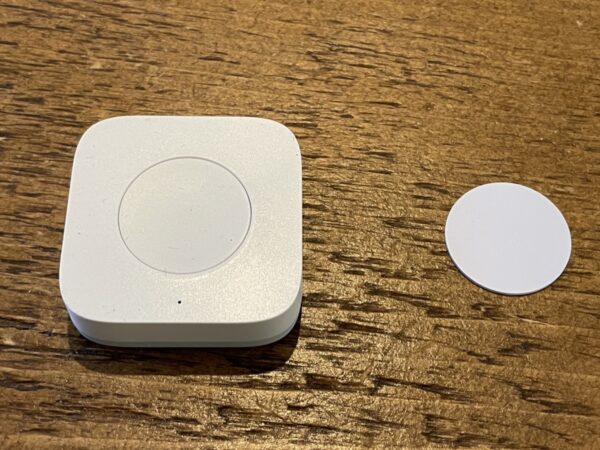
A Xiaomi Zigbee button on the left; one of my NFC tags on the right. The NFC tag is an inch in diameter.

But if you don’t mind pulling out your phone, NFC tags have some key advantages: they’re small, weatherproof, require no battery and can do more things. You can also arrange that they do different things depending on who’s scanning them, so, for example, you could stick one beside your garage door; when you scan it, it unlocks your car, when your spouse scans it, it unlocks theirs, and when anyone else scans it, it does nothing (or perhaps causes your security camera to take a photo of them!)

Some tips

NFC tags each have a fixed unique ID, and for simple interactions you can just arrange that your phone does something when a particular ID is scanned.

But they can also be programmed with custom data using a protocol/format known as NDEF. There are standard ways of storing URLs, phone numbers, etc, much as you would with a QR code. So if you want a tag to take you to a web page, for example, without your phone needing to know anything about the tag in advance, this is a good way to do it.

If you want to experiment with this, then the Simply NFC app is a good place to start. Another good and completely free one is NFC TagWriter by NXP, but for the particular issue of reading things with an iPhone, I had more luck with Simply NFC. And a key thing to know if you’re using small tags is that the NFC reader is at the top of the back of your phone near the camera, and this needs to be within about a centimetre of the tag.

Recent iPhones will read a subset of these tag types in the background (i.e. without you having to run an app). As an example, I’ve just programmed a tag here with my email address (a mailto: link), and if I scan it, a notification pops up offering to take me to the mail app to send a message. I can do this with my iPhone at the home screen, or even the lock screen. More complex email variants, though, (for example, including an email subject line), don’t seem to work without running a special app.

Home Assistant – the simple way, and doing it better

Recent versions of the Home Assistant app know how to program NFC tags, and scan them, and associate them with Home Assistant actions. This is very cool, and gives you lots of information about who’s doing the scanning, etc.

But it has a problem on iOS: Apple doesn’t let an NFC tag perform an action on your phone without your confirmation. So instead of just pulling out your phone and tapping it on the tag, you also need to look for the resulting notification and confirm that you want the action to take place, which spoils the magic a bit. This isn’t an issue, I gather, on Android, but Apple are more cautious about doing things behind your back, especially, I guess, since an NFC tag could be hidden and yet still accidentally scannable.

However, there is one way to allow tags to perform actions on an iPhone without requiring your confirmation each time.

If you create an ‘automation’ on your iPhone using the Shortcuts app (not to be confused with a Home Assistant automation), you can choose to trigger this with an NFC tag.
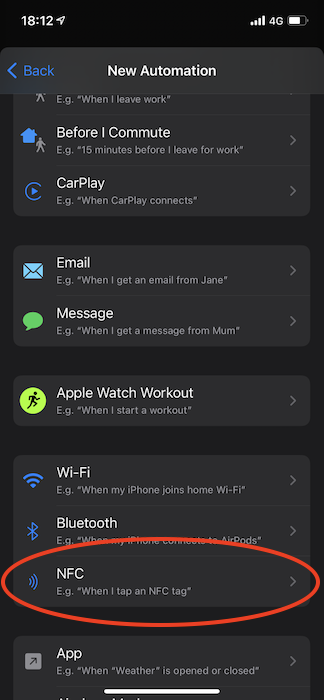
You don’t need to program the tag: this just uses its ID, I think.

Now, an iPhone automation can do all sorts of things, including requesting a URL. And Home Assistant allows you to create webhooks which can trigger Home Assistant automations in response to a URL being requested.

Setting up a webhook

You can find information on how to create a Home Assistant webhook online, depending on whether you create your automations through the GUI or using YAML. Here’s my simple example called study_toggle, which toggles both ceiling lights in my study:

- alias: Toggle study lights
  trigger:
    - platform: webhook
      webhook_id: study_toggle
  action:
    - service: homeassistant.toggle
      entity_id: light.q_study_back
    - service: homeassistant.toggle
      entity_id: light.q_study_front

I can cause this automation to be run using the URL `/api/webhook/study_toggle’ on my Home Assistant server.

NOTE: It’s important to remember that webhooks don’t require authentication, so if your server is at all accessible to the outside world you should make sure you use more obscure URLs! Please don’t have one called http://homeassistant.me.org/api/webhook/open_garage!

Calling the webhook

OK, back to the iPhone. Now, your phone will need to make an HTTP POST request to that URL, but fortunately, this is easy to do. When adding an action to your automation, go into the ‘Web’ section and use ‘Get contents of URL’:
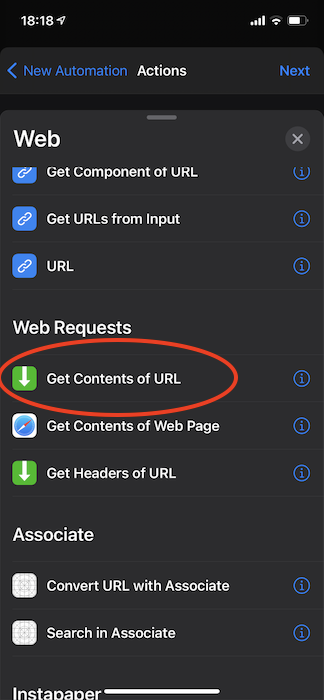
Then you can put in the URL and expand the ‘Show more’ section, which will let you change the HTTP method from GET to POST.
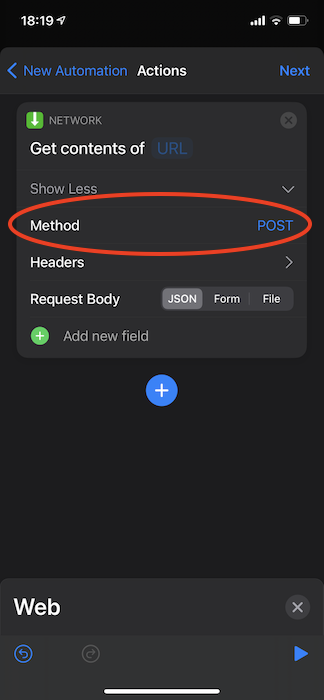
There’s no need to send any data in the request body, but you can add some JSON if you wish to make use of it in Home Assistant.

And that’s basically it! Make sure you turn off the ‘Ask Before Running’ option on the automation.

Now, the first time you scan the tag, it will still ask you for confirmation, but it’ll also give you the option not to be asked in future, at which point you can just tap the tag to run the action. Your phone does need to be unlocked.

Some hints

If you use Nabu Casa’s Home Assistant Cloud, they make it easy to get a long obscure URL which will link to your webhook and which will be accessible from anywhere. (If you set this up on your Mac, you’ll really want your ‘Universal Clipboard‘ enabled so you can copy on the Mac and paste on the phone!)

This is handy if you might want to put the tag somewhere away from your home, e.g. if it’s the last thing you scan before you leave the office to notify your spouse that you’re on the way. I’ve also heard of people sticking tags to their car dashboard which will open or close the garage door.

But if you’re only using the tag to control things when you’re actually at home, you’ll make it a lot more snappy if you keep everything on your local network, don’t go via lots of proxies, and you could even use an IP address to avoid a DNS lookup. So my actual tag to toggle my study lights calls a URL which is something like:

http://192.168.0.30:8123/api/webhook/study_toggle_x65fedwibble

and it’s pretty much instantaneous.
iOS tip of the day

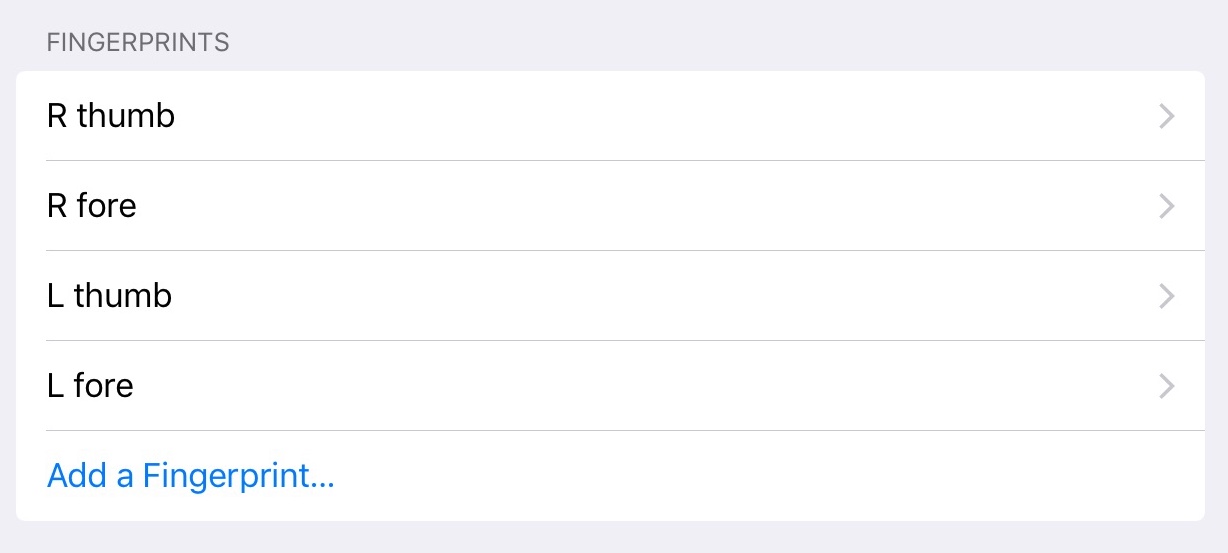
When you’re setting up your fingerprints for Touch ID, take the time after registering each one to go in and give it a name. Then if you find one finger becoming unreliable, you know which one to delete and reprogram.

The Great Beyond

The Great Beyond

Tilly, captured on her afternoon walk by my iPhone 6. It’s a pretty good camera in the right conditions, given the size of the lens. Click to see more detail.

If this shot looks vaguely familiar, you might have seen this one a couple of years ago.

Spinning the cloud

You might think that, of all the household devices that could be connected to the ‘net, a washing machine would be amongst the least useful, except perhaps for the purposes of energy monitoring or service diagnostics.

So I was particularly impressed with Berg’s Cloudwash demonstrator, which emphasises the user interface aspects of connectivity. It’s always struck me that washing machines tend to have particularly awful user interfaces. Until very recently, for example, we had one where program ‘4’ was the one we used all the time. We needed to remember that, and on the rare occasions when we needed a different program, we had to look it up on a card.

Often, by giving a device connectivity, you can also give it a better user interface, even if that’s only used to configure the buttons on the front.

Photostream2Folder

Apple users, especially those with iPhones or iPads, will know about the Photo Stream cloud service that makes your recent photos available on all your devices. You can take a photo on your phone, open up your laptop, and find it already available in iPhoto or Aperture.

But what if you don’t use iPhoto or Aperture? (I’ve recently switched to Lightroom and found myself missing this feature). Or you want to do something automatically with every photo you take, like emailing them to Granny?

Well, then you want Laurent Crivello’s Photostream2Folder utility, which polls your stream periodically and simply puts the recent photos in a folder on your disk. Very handy.

The King is Dead; Long Live the King

This came out a week ago, but I think it’s worth noting for those who missed it. There’s a piece in Business Insider based on an interesting fact first noted by MG Siegler. It’s this:

Apple’s iPhone business is bigger than Microsoft

Note, not Microsoft’s phone business. Not Windows. Not Office. But Microsoft’s entire business. Gosh.

As the article puts it:

The iPhone did not exist five years ago. And now it’s bigger than a company that, 15 years ago, was dragged into court and threatened with forcible break-up because it had amassed an unassailable and unthinkably profitable monopoly.

My name is Ozzie-mandias, king of kings: Look on my works, ye mighty, and despair…

Having the plastic to go paperless

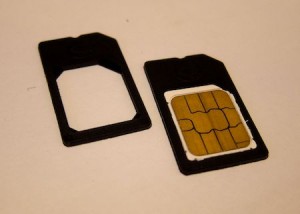
Micro-SIM adapterKeen though I am to reduce the amount of paper in my life, I am still hesitant about switching all of my utility bills to electronic form because they are often useful, in the UK, as proof of your residential address.

Mobile phone bills, however, tend to be excluded, and since almost every gadget I buy comes with a SIM, I now have quite a few of these! But there’s a different problem when it comes to switching many of these to paperless billing, as illustrated just now by my iPad contract with Vodafone. How do you do it?

Well, you go to Vodafone’s site, and register for an online account. The first thing you need to do is enter your phone number. What is the phone number of my iPhone? Fortunately I had a recent bill handy, so I could look it up, never having needed it for anything other than this before.

Then you hit a second problem. They send you a text message with a security code in it, which you need to enter into the web site. Except, as they well know, this is an iPad, on a special iPad-only contract, and it sadly has no way of reading text messages. (Nor does my Mifi. Nor my 3G dongle, at least with a Mac.) Mmm….

OK, well, SMS messages are sent to the number identified by the SIM, not the device, so I can take the SIM out of the iPad and put it in a phone. (As a matter of course, I always have all my devices unlocked whenever I possibly can, just to make this sort of thing possible.)

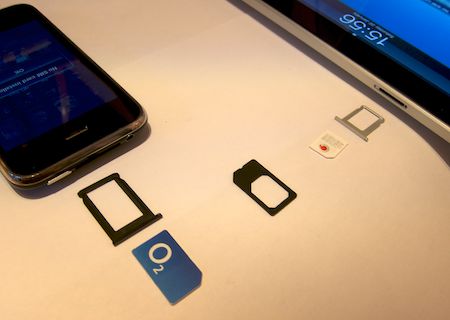
Then you hit the third problem. My whopping great iPad has a micro-SIM, while my decidedly smaller iPhone has a regular sized SIM. Fortunately, you can buy adapters which convert one to the other. (If you need to go the other way, you can do so with a pair of scissors, or with a special cutter.)

So the process becomes: move SIM from non-SMS-receiving device to receiving device, having previously unlocked the latter if they’re on different networks, and making use of cutters or adapters as required, then register on first device’s network website, noting and entering any codes that may be texted to you, then restore everything to its previous state afterwards. In the States, where there’s a reasonable chance that your different devices wouldn’t have compatible radio circuitry, it would be even worse.

One feels that this might be a bit of an oversight on the part of the service providers…

© Copyright Quentin Stafford-Fraser